Implementing Frontend Setting
🍽 Let’s Create the Frontend
In this section, we will build a frontend that interacts with our smart contract.
This time, we’ll use TypeScript + React + Next.js for frontend development.
TypeScript: Programming languageReact.js: LibraryNext.js: Framework forReact.js
For an overview of each, please refer to this link. If this is your first time using them, you might find it helpful 💁(The English version hasn’t been released yet.)
🛠️ Let’s Set Up the Frontend
Navigate to the AVAX-AMM/packages directory and run:
yarn create next-app client --ts
Here, we’re using the create-next-app package to create a project named client.
The --ts flag specifies that we will use TypeScript.
The client directory will be created with the minimal setup required for a Next.js project.
At this stage, your folder structure should look like this:
AVAX-AMM
 ├── .gitignore
 ├── package.json
 ├── packages/
+│   ├── client/
 │   └── contract/
 └── tsconfig.json
Open the package.json inside the client directory and confirm that "private": true is set (just like in the package.json inside the contract directory).
If it’s not set, add it.
Now, let’s install the packages we’ll need for development. Move into the newly created client directory and run:
yarn add ethers@5.7.1 @metamask/providers@9.1.0 react-icons
ethers: Used to interact with the smart contract@metamask/providers: Provides TypeScript types for interacting with MetaMaskreact-icons: Allows you to use ready-made icons in React
Let’s check that our development environment works properly.
If node_modules/ or yarn.lock already exist in the client directory, delete them.
Then, from the root AVAX-AMM directory, run:
yarn install
yarn client dev
Open your browser and go to:
http://localhost:3000
You will see the default website frontend.
⚠️ We are using the Chrome browser for this guide. If you encounter any issues, try switching browser.
Example: Local environment displaying the website
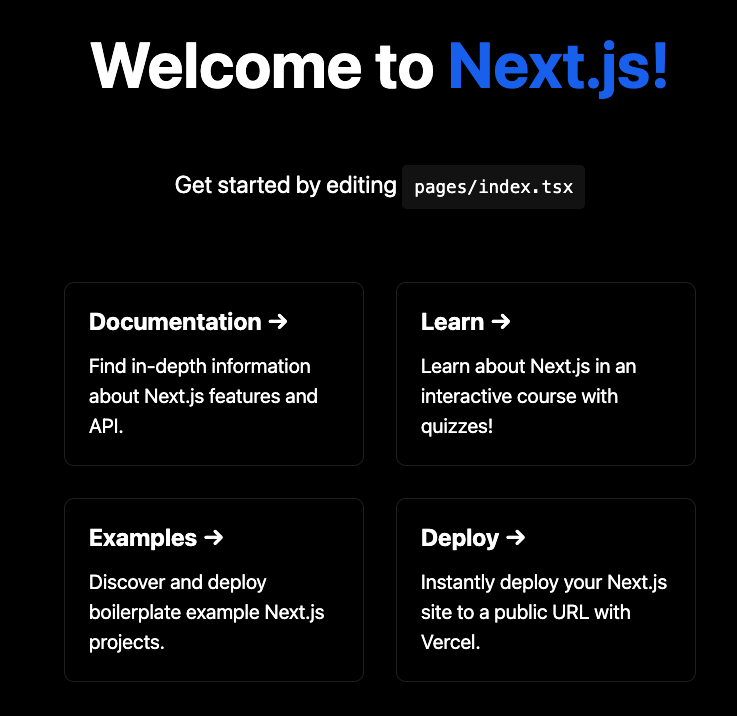
If your frontend looks like the above, you’re good to go!
From now on, whenever you want to view the frontend, run:
- From the
AVAX-AMMdirectory:yarn client dev - Or from inside the
clientdirectory:yarn dev
To stop the local server:
- Mac:
ctrl + c - Windows:
ctrl + shift + w
The folder structure inside client should look like this:
client
├── README.md
├── next-env.d.ts
├── next.config.js
├── package.json
├── pages
│   ├── _app.tsx
│   ├── api
│   │   └── hello.ts
│   └── index.tsx
├── public
│   ├── favicon.ico
│   └── vercel.svg
├── styles
│   ├── Home.module.css
│   └── globals.css
└── tsconfig.json
🦊 Download MetaMask
We’ll need a wallet to connect to our web application. In this project, we’ll use MetaMask.
📓 About Core Wallet Ava Labs (the team behind the Avalanche ecosystem) supports a wallet called Core. Using Core can potentially enable faster transactions optimized for Avalanche. However, since it’s still in beta and may have bugs or frequent changes, we won’t use it here—but it’s worth keeping an eye on.
- Download MetaMask from here and install it as a browser extension.
✍️: Why we need MetaMask When a user calls a smart contract, they need a wallet containing their address and private key. This serves as an authentication step.
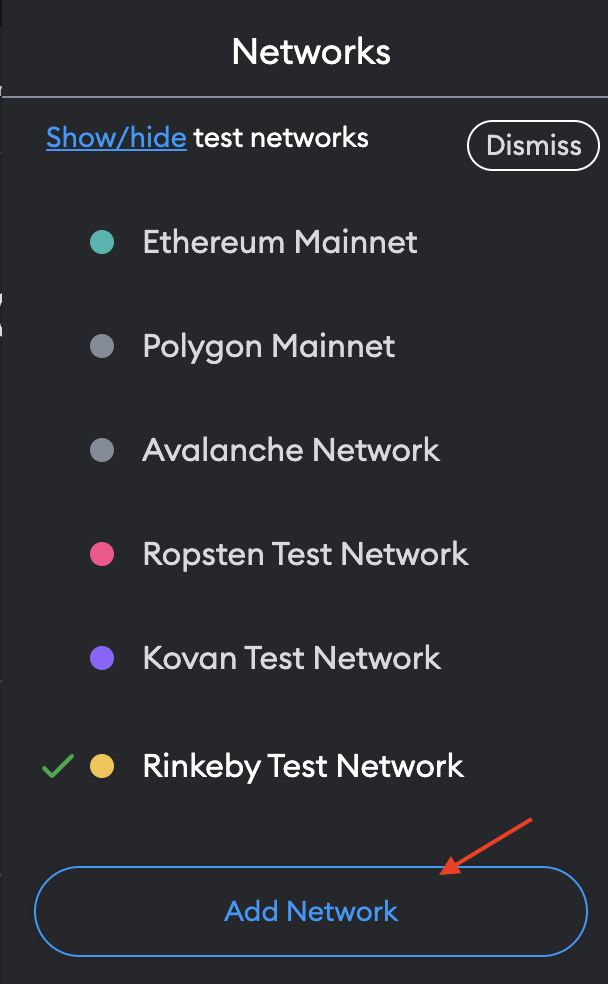
Once MetaMask is installed, let’s add the Avalanche test network.
Open MetaMask, click the network dropdown at the top, and select Add Network.
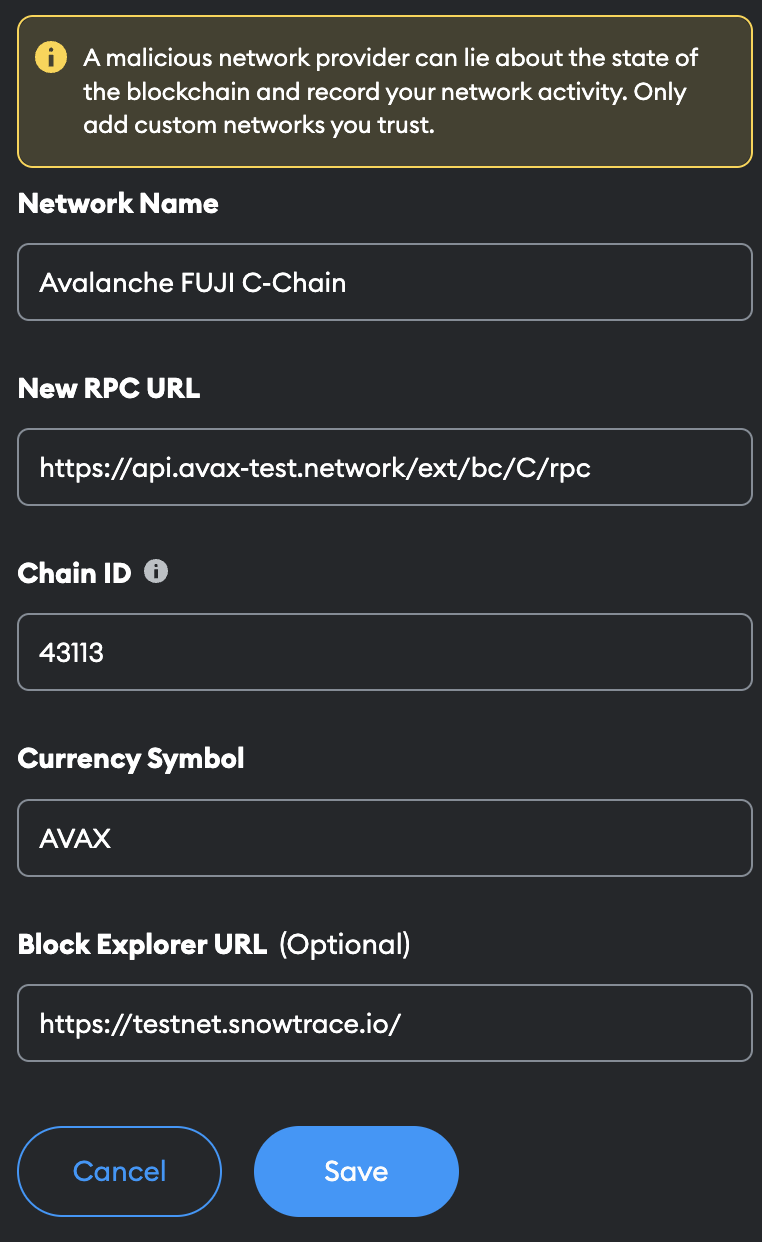
On the settings page, enter the following details and click save:
Network Name: Avalanche FUJI C-Chain
New RPC URL: https://api.avax-test.network/ext/bc/C/rpc
ChainID: 43113
Symbol: AVAX
Explorer: https://testnet.snowtrace.io/
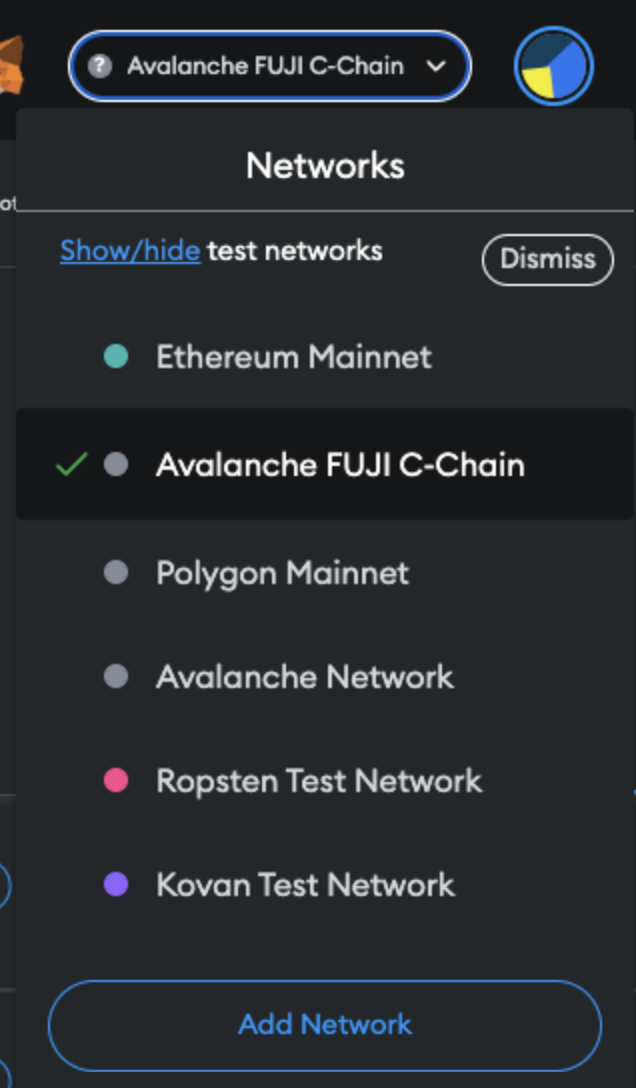
If successful, you will now see Avalanche Fuji C-Chain in your network list.
🚰 Get AVAX Using the Faucet
Next, go to the Avalanche Faucet to get some AVAX.
This is fake AVAX that can only be used on the testnet.
Enter your wallet address in the form and request the tokens. 💁 You can copy your wallet address by clicking your account name at the top of MetaMask.
🙋♂️ Ask Questions
If you have any questions about the steps so far, please ask in Discord’s #avalanche channel.
To make the help process smoother, include the following in your error report ✨
1. The section number and lesson number related to your question
2. What you were trying to do
3. Copy & paste the error message
4. A screenshot of the error
Once your frontend environment is ready, move on to the next lesson 🎉