lesson-2_SOLをUSDCに変更しよう
🤑 SOL から USDC に変更する
USDCのトランザクションはSOLのトランザクションと非常によく似ています。
ここでの変更点は、トランザクション関数で別のタイプの命令を呼び出すことです。
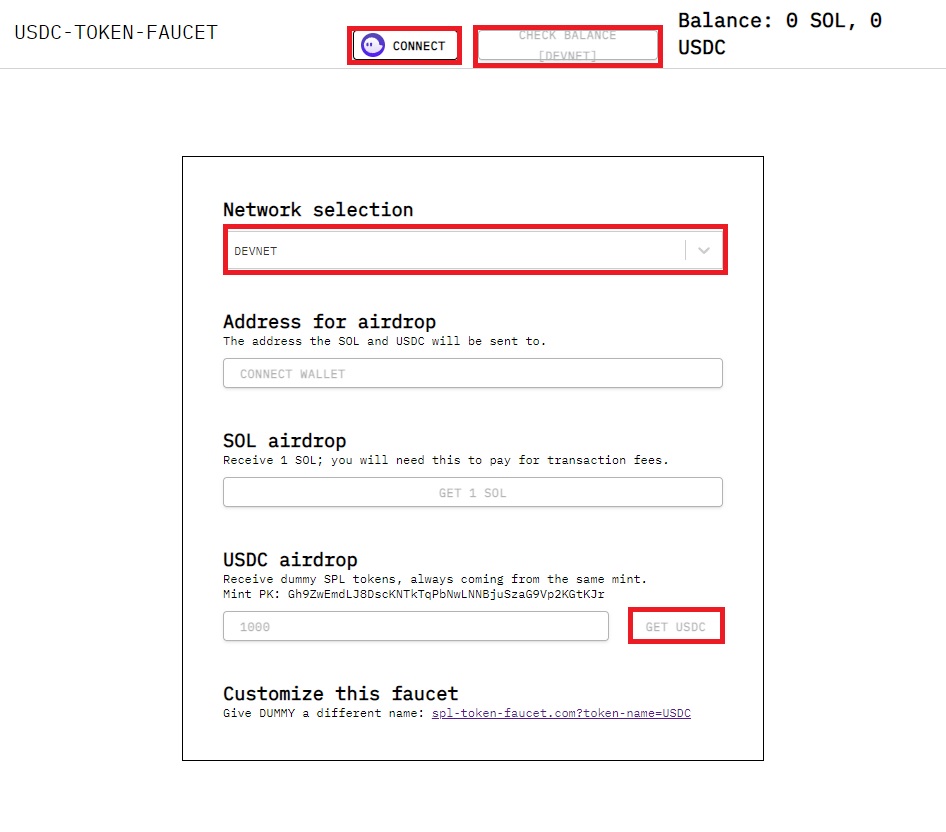
まず、ここで、Solana上で展開されているdevnet用のUSDCトークン受け取ってください。
ウォレットを接続して、「Network selection」から「DEVNET」を選択し、「Address for airdrop」に自分のアドレスを入れ、「USDC airdrop」のGET USDCボタンを押すとUSDCがAirdropされます。

USDCを手に入れたら、pages/apiフォルダ内のcreateTransaction.jsを以下のとおり更新します。
※ コピー&ペーストした後、sellerAddressの値を自分のウォレットアドレスに変更するのを忘れないでください!
// createTransaction.js

import {
  createTransferCheckedInstruction,
  getAssociatedTokenAddress,
  getMint,
} from "@solana/spl-token";
import { WalletAdapterNetwork } from "@solana/wallet-adapter-base";
import {
  clusterApiUrl,
  Connection,
  PublicKey,
  Transaction,
} from "@solana/web3.js";
import BigNumber from "bignumber.js";

import products from "./products.json";

// devネット上のUSDCトークンのアドレスを設定します。
const usdcAddress = new PublicKey(
  "Gh9ZwEmdLJ8DscKNTkTqPbNwLNNBjuSzaG9Vp2KGtKJr"
);
// このウォレットアドレスを書き換えましょう!
const sellerAddress = "あなたのウォレットアドレス";
const sellerPublicKey = new PublicKey(sellerAddress);

const createTransaction = async (req, res) => {
  try {
    const { buyer, orderID, itemID } = req.body;
    if (!buyer) {
      res.status(400).json({
        message: "Missing buyer address",
      });
    }

    if (!orderID) {
      res.status(400).json({
        message: "Missing order ID",
      });
    }

    const itemPrice = products.find((item) => item.id === itemID).price;

    if (!itemPrice) {
      res.status(404).json({
        message: "Item not found. please check item ID",
      });
    }

    const bigAmount = BigNumber(itemPrice);
    const buyerPublicKey = new PublicKey(buyer);

    const network = WalletAdapterNetwork.Devnet;
    const endpoint = clusterApiUrl(network);
    const connection = new Connection(endpoint);

    const buyerUsdcAddress = await getAssociatedTokenAddress(
      usdcAddress,
      buyerPublicKey
    );
    const shopUsdcAddress = await getAssociatedTokenAddress(
      usdcAddress,
      sellerPublicKey
    );
    const { blockhash } = await connection.getLatestBlockhash("finalized");

    // 転送するトークンのミントアドレスを取得しています。
    const usdcMint = await getMint(connection, usdcAddress);

    const tx = new Transaction({
      recentBlockhash: blockhash,
      feePayer: buyerPublicKey,
    });

    // SOLとは異なるタイプの命令を作成しています。
    const transferInstruction = createTransferCheckedInstruction(
      buyerUsdcAddress,
      usdcAddress, // 転送するトークンのアドレスです。
      shopUsdcAddress,
      buyerPublicKey,
      bigAmount.toNumber() * 10 ** (await usdcMint).decimals,
      usdcMint.decimals // トークンには任意の数の小数を含めることができます。
    );

    // 以下の変更はなしです。
    transferInstruction.keys.push({
      pubkey: new PublicKey(orderID),
      isSigner: false,
      isWritable: false,
    });

    tx.add(transferInstruction);

    const serializedTransaction = tx.serialize({
      requireAllSignatures: false,
    });

    const base64 = serializedTransaction.toString("base64");

    res.status(200).json({
      transaction: base64,
    });
  } catch (err) {
    console.error(err);

    res.status(500).json({ error: "error creating transaction" });
  }
};

export default function handler(req, res) {
  if (req.method === "POST") {
    createTransaction(req, res);
  } else {
    res.status(405).end();
  }
}
最初に追加したのはfaucetから取得(記載のある)したdevnet上に存在するUSDCトークンのトークンアドレスです。
const usdcAddress = new PublicKey(
  "Gh9ZwEmdLJ8DscKNTkTqPbNwLNNBjuSzaG9Vp2KGtKJr"
);
このアドレスを使用して、USDCトークンアカウントのアドレスを探して扱えるようにします。
Solana上の代替可能なトークンは、トークンプログラムにより作成されます。
これは、各トークンが独自のアカウント(アドレス)を持つことを意味します。
Solanaアカウントをホテル、各トークンのアカウントをホテルの部屋と考えると、ホテルの部屋の中を見るためには部屋番号が必要になります。
つまり、トークンアカウントからトークンを送信するためには、そのトークンのアドレスを知る必要があるということです。
※ユーザーアカウントにUSDCが入っていない場合、USDCトークンアドレスが存在しないと認識されてしまうため、送信先・送信元の両方のユーザーアカウントにUSDCが必要となります。
const transferInstruction = createTransferCheckedInstruction(
  buyerUsdcAddress,
  usdcAddress,
  shopUsdcAddress,
  buyerPublicKey,
  bigAmount.toNumber() * 10 ** (await usdcMint).decimals,
  usdcMint.decimals
);
ちなみに、上記の部分を任意のSPL トークンに置き換えても機能します。
Buy now →ボタンをクリックすると、トークン名(アドレスで表示される)「Gh9ZwEmdLJ8DscKNTkTqPbNwLNNBjuSzaG9Vp2KGtKJr」のリクエストが表示されるはずです。
これは偽の USDC トークンのアドレスですが、メインネットではこれがUSDCとなるわけです。
説明だけでは分かりづらいところがあるので、sellerAddressに設定したアドレスAとは別のアドレスBでWebアプリケーションに接続し、実際にBuy now →ボタンを押して購入してみてください。
アドレスBから、所定の金額がアドレスAに送金されていることが分かるはずです(初期設定では金額が0.09 USDCとなっているので、分かりやすいように10.00 USDCに変更して試してみてください)。
以上で、USDCでの支払いの準備が整いました!
🙋♂️ 質問する
ここまでの作業で何かわからないことがある場合は、Discordの#solanaで質問をしてください。
ヘルプをするときのフローが円滑になるので、エラーレポートには下記の4点を記載してください ✨
1. 質問が関連しているセクション番号とレッスン番号
2. 何をしようとしていたか
3. エラー文をコピー&ペースト
4. エラー画面のスクリーンショット
次のレッスンでは、注文情報の保存機能を実装します!