商品を追加しよう
🐱 商品を追加しよう!
オンラインショップの完成は間近です!
さいごに、ショップのオーナーであるあなたが フロントエンドから ショップにアイテムを追加できる機能を追加します。
まず、プロジェクトのルートディレクトリに.env.localファイルを作成し、そこにアドレスを追加します。
私の場合、.env.localファイルは以下のようになります。
// .env.local
NEXT_PUBLIC_OWNER_PUBLIC_KEY=2TmQsWGFh5vhqJdDrG6uA2MRstGrUwUCiiThyHL9HaMe
⚠️ 注意
Next.js には dotenv が組み込まれていますが、env 変数名を
NEXT_PUBLICからはじめる必要があります。また、
.env.localへの変更を反映させるためには、Next.js を再起動(CTR + Cで一旦停止させ、yarn devで再び立ち上げる)する必要があることに注意してください。
それでは、componentsフォルダにCreateProduct.jsファイルを作成して以下のコードを貼り付けてください。
// CreateProduct.js

import { create } from "ipfs-http-client";
import { useState } from "react";

import styles from "../styles/CreateProduct.module.css";

const client = create("https://ipfs.infura.io:5001/api/v0");

const CreateProduct = () => {
  const [newProduct, setNewProduct] = useState({
    name: "",
    price: "",
    imageUrl: "",
    description: "",
  });
  const [file, setFile] = useState({});
  const [uploading, setUploading] = useState(false);

  async function onChange(e) {
    setUploading(true);
    const files = e.target.files;
    try {
      console.log(files[0]);
      const added = await client.add(files[0]);
      setFile({ filename: files[0].name, hash: added.path });
    } catch (error) {
      console.log("Error uploading file: ", error);
    }
    setUploading(false);
  }

  const createProduct = async () => {
    try {
      // 商品データとfile.nameを結合します。
      const product = { ...newProduct, ...file };
      console.log("Sending product to api", product);
      const response = await fetch("../api/addProduct", {
        method: "POST",
        headers: {
          "Content-Type": "application/json",
        },
        body: JSON.stringify(product),
      });
      if (response.status === 200) {
        alert("Product added!");
      } else {
        const data = await response.json();
        alert("Unable to add product: ", data.error);
      }
    } catch (error) {
      console.log(error);
    }
  };

  return (
    <div className={styles.background_blur}>
      <div className={styles.create_product_container}>
        <div className={styles.create_product_form}>
          <header className={styles.header}>
            <h1>Create Product</h1>
          </header>

          <div className={styles.form_container}>
            <input
              type="file"
              className={styles.input}
              accept=".jpg,.png"
              placeholder="Images"
              onChange={onChange}
            />
            {file.name != null && <p className="file-name">{file.filename}</p>}
            <div className={styles.flex_row}>
              <input
                className={styles.input}
                type="text"
                placeholder="Product Name"
                onChange={(e) => {
                  setNewProduct({ ...newProduct, name: e.target.value });
                }}
              />
              <input
                className={styles.input}
                type="text"
                placeholder="0.01 USDC"
                onChange={(e) => {
                  setNewProduct({ ...newProduct, price: e.target.value });
                }}
              />
            </div>

            <div className={styles.flex_row}>
              <input
                className={styles.input}
                type="url"
                placeholder="Image URL ex: https://media.giphy.com/media/FWAcpJsFT9mvrv0e7a/giphy.gif"
                onChange={(e) => {
                  setNewProduct({ ...newProduct, imageUrl: e.target.value });
                }}
              />
            </div>
            <textarea
              className={styles.text_area}
              placeholder="Description here..."
              onChange={(e) => {
                setNewProduct({ ...newProduct, description: e.target.value });
              }}
            />

            <button
              className={styles.button}
              onClick={() => {
                createProduct();
              }}
              disabled={uploading}
            >
              Create Product
            </button>
          </div>
        </div>
      </div>
    </div>
  );
};

export default CreateProduct;
✅ コンポーネントの動作確認
CreateProductコンポーネントを実装したので、テストスクリプトを実行してみましょう。
簡単にテスト内容を説明します。__tests__/CreateProduct.test.jsでは、アイテム追加の成功・失敗に応じて期待するアラートが実行されるかをテストしています。
Buyコンポーネントのテスト同様、動作確認を行いたいステータスに対応する戻り値を定義します。
// __tests__/CreateProduct.test.js
const addedProductMock = () => {
  return Promise.resolve({
    status: 200,
    json: () => Promise.resolve({}),
  });
};

const errorAddedProductMock = () => {
  return Promise.resolve({
    status: 500,
    json: () => Promise.resolve({ error: "error" }),
  });
};
成功ステータスをテストする場合は、下記のようにフォーム要素を取得して、値を入力後にボタンをクリックする動作をシミュレートします。
// __tests__/CreateProduct.test.js
const formFileElement = screen.getByPlaceholderText(/Images/i);
const formNameElement = screen.getByPlaceholderText(/Product Name/i);
const formPriceElement = screen.getByPlaceholderText(/0.01 USDC/i);
const formImageUrlElement = screen.getByPlaceholderText(/Image URL/i);
const formDescriptionElement = screen.getByPlaceholderText(/Description/i);
const btnElement = screen.getByRole("button", {
  name: /Create Product/i,
});

/** 実行 */
await userEvent.type(formFileElement, "file");
await userEvent.type(formNameElement, "name");
await userEvent.type(formPriceElement, "price");
await userEvent.type(formImageUrlElement, "imageUrl");
await userEvent.type(formDescriptionElement, "description");
await userEvent.click(btnElement);
確認部分では、fetch関数とalert関数が期待する引数で実行されているかを確認しています。
// __tests__/CreateProduct.test.js
/** 確認 */
expect(fetch).toBeCalledWith("../api/addProduct", {
  method: "POST",
  headers: {
    "Content-Type": "application/json",
  },
  body: JSON.stringify({
    name: "name",
    price: "price",
    imageUrl: "imageUrl",
    description: "description",
  }),
});
expect(window.alert).toBeCalledWith("Product added!");
エラーステータスをテストする場合は、fetch関数の戻り値にerrorAddedProductMockを設定して、alert関数が期待する引数で実行されているかを確認しています。
それでは、テストスクリプトを実行してみましょう。package.jsonファイルのjestコマンドを更新します。
// package.json
"scripts": {
  // 下記に更新
  "test": "jest"
}
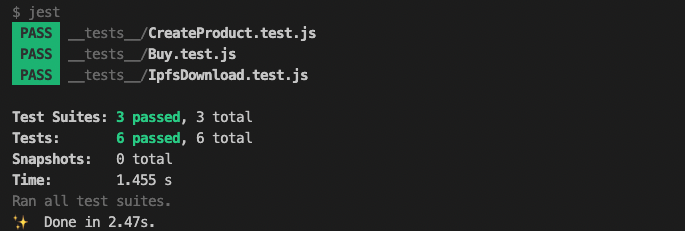
jestコマンドを更新したら、ターミナルでyarn testを実行してみましょう。
yarn test
テストがパスしたら、CreateProductコンポーネントの実装は完了です。
🛒 商品追加ボタンの表示
次に、index.jsを以下のとおり更新して、登録したアドレスとメッセージ送信者のアドレスが一致するのを確認できるようにしましょう(ここでショップのオーナーを確認します)。
// index.js

import { useWallet } from "@solana/wallet-adapter-react";
import dynamic from "next/dynamic";
import { useEffect, useState } from "react";

import CreateProduct from "../components/CreateProduct";
import HeadComponent from "../components/Head";
import Product from "../components/Product";

// 参照: https://github.com/solana-labs/wallet-adapter/issues/648
const WalletMultiButtonDynamic = dynamic(
  async () =>
    (await import("@solana/wallet-adapter-react-ui")).WalletMultiButton,
  { ssr: false }
);

// 定数を宣言します。
const TWITTER_HANDLE = "あなたのTwitterハンドル";
const TWITTER_LINK = `https://twitter.com/${TWITTER_HANDLE}`;

const App = () => {
  const { publicKey } = useWallet();
  const isOwner = publicKey
    ? publicKey.toString() === process.env.NEXT_PUBLIC_OWNER_PUBLIC_KEY
    : false;
  const [creating, setCreating] = useState(false);
  const [products, setProducts] = useState([]);

  const renderNotConnectedContainer = () => (
    <div>
      <img
        src="https://media.giphy.com/media/FWAcpJsFT9mvrv0e7a/giphy.gif"
        alt="anya"
      />
      <div className="button-container">
        <WalletMultiButtonDynamic className="cta-button connect-wallet-button" />
      </div>
    </div>
  );

  useEffect(() => {
    if (publicKey) {
      fetch(`/api/fetchProducts`)
        .then((response) => response.json())
        .then((data) => {
          setProducts(data);
          console.log("Products", data);
        });
    }
  }, [publicKey]);

  const renderItemBuyContainer = () => (
    <div className="products-container">
      {products.map((product) => (
        <Product key={product.id} product={product} />
      ))}
    </div>
  );

  return (
    <div className="App">
      <HeadComponent />
      <div className="container">
        <header className="header-container">
          <p className="header"> 😳 UNCHAIN Image Store 😈</p>
          <p className="sub-text">
            The only Image store that accepts shitcoins
          </p>

          {isOwner && (
            <button
              className="create-product-button"
              onClick={() => setCreating(!creating)}
            >
              {creating ? "Close" : "Create Product"}
            </button>
          )}
        </header>

        <main>
          {creating && <CreateProduct />}
          {publicKey ? renderItemBuyContainer() : renderNotConnectedContainer()}
        </main>

        <div className="footer-container">
          <img
            alt="Twitter Logo"
            className="twitter-logo"
            src="twitter-logo.svg"
          />
          <a
            className="footer-text"
            href={TWITTER_LINK}
            target="_blank"
            rel="noreferrer"
          >{`built on @${TWITTER_HANDLE}`}</a>
        </div>
      </div>
    </div>
  );
};

export default App;
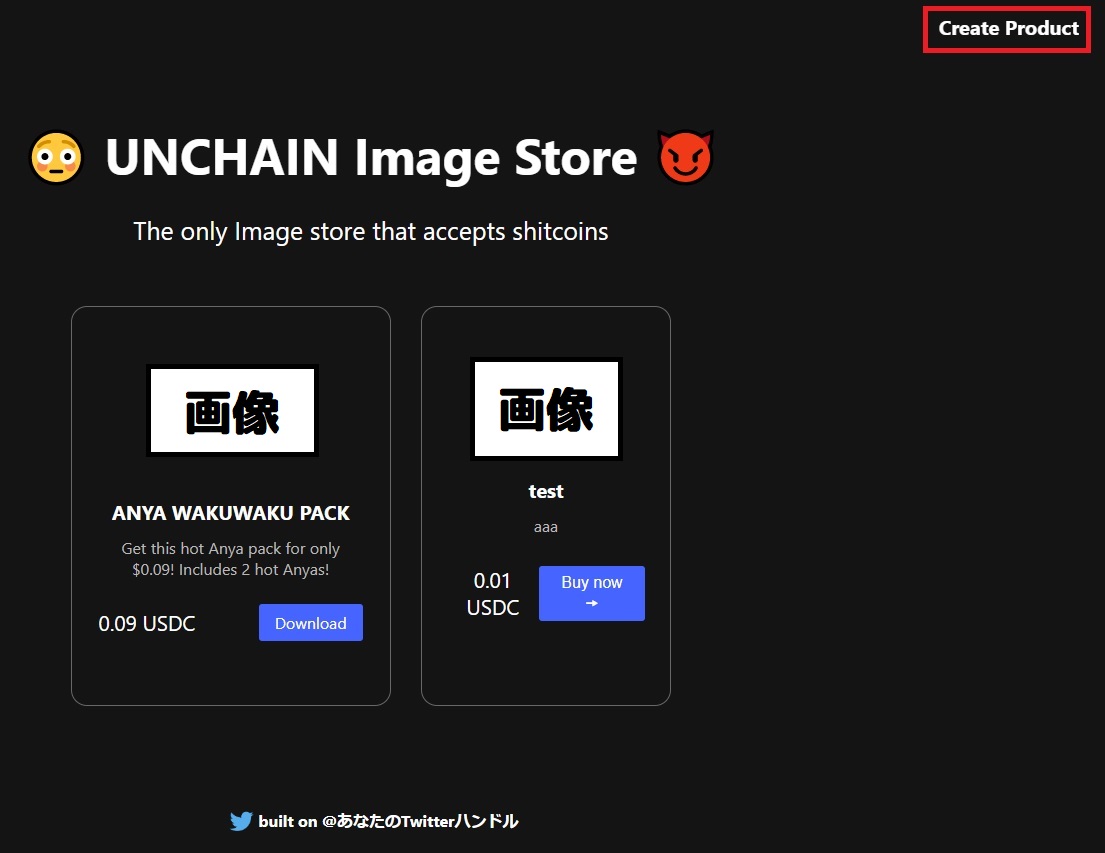
これで、オーナーと同じウォレットで接続すると、右上にCreate Productボタンが表示されるはずです。
最後に、データベースにAPIエンドポイントを追加しましょう。
pages/apiフォルダにaddProduct.jsファイルを作成して以下のコードを貼り付けてください。
// addProduct.js

import fs from "fs";

import products from "./products.json";

export default function handler(req, res) {
  if (req.method === "POST") {
    try {
      console.log("body is ", req.body);
      const { name, price, imageUrl, description, filename, hash } = req.body;

      // 前回のプロダクトIDを元に新しいプロダクトIDを作成します。
      const maxID = products.reduce(
        (max, product) => Math.max(max, product.id),
        0
      );
      products.push({
        id: maxID + 1,
        name,
        price,
        imageUrl,
        description,
        filename,
        hash,
      });
      fs.writeFileSync(
        "./pages/api/products.json",
        JSON.stringify(products, null, 2)
      );
      res.status(200).send({ status: "ok" });
    } catch (error) {
      console.error(error);
      res.status(500).json({ error: "error adding product" });
    }
  } else {
    res.status(405).send(`Method ${req.method} not allowed`);
  }
}
これでアイテムを追加することができるようになりました!
※値段の欄には数字だけを入れるよう、注意してください。
🙋♂️ 質問する
ここまでの作業で何かわ�からないことがある場合は、Discordの#solanaで質問をしてください。
ヘルプをするときのフローが円滑になるので、エラーレポートには下記の4点を記載してください ✨
1. 質問が関連しているセクション番号とレッスン番号
2. 何をしようとしていたか
3. エラー文をコピー&ペースト
4. エラー画面のスクリーンショット
おめでとうございます!
セクション3は終了です!
ぜひ、新しく追加した商品が表示されている状態のWebアプリケーションの画面をコミュニティに投稿してください!
あなたの成功をコミュニティで祝いましょう 🎉
次のセクションでは、最後の仕上げを行っていきます!