lesson-1_アプリを完成させよう
🚀 アプリを完成させましょう!
それではフロントエンドで追加したコントラクトの機能を使用するように変更し, アプリを完成させましょう!
初めにfrontend/assets/js/near/utils.jsを次のように変更します。
// utils.js

// ...

export async function initContract() {
  // ...

  // コントラクトAPIの初期化
  window.contract = await new Contract(
    window.walletConnection.account(),
    nearConfig.contractName,
    {
      viewMethods: [
        "num_of_bikes",
        "is_available",
        "who_is_using",
        "who_is_inspecting",
        "amount_to_use_bike", // <- 追加!
      ],
      changeMethods: ["inspect_bike", "return_bike"], // <- "use_bike" 削除
    }
  );

  // ftコントラクトとの接続を追加
  window.ftContract = await new Contract(
    window.walletConnection.account(),
    nearConfig.ftContractName,
    {
      viewMethods: ["ft_balance_of", "storage_balance_of"],
      changeMethods: [
        "storage_deposit",
        "storage_unregister",
        "ft_transfer",
        "ft_transfer_call", // <- 追加!
      ],
    }
  );
}

// ...

/* use_bikeを削除してください!
export async function use_bike(index) {
  const response = await window.contract.use_bike({
    index: index,
  });
  return response;
}
*/

// ...

export async function amount_to_use_bike() {
  const amount = await window.contract.amount_to_use_bike();
  return amount;
}

export async function ft_transfer_call(index, amount) {
  const response = await window.ftContract.ft_transfer_call(
    {
      receiver_id: nearConfig.contractName,
      amount: amount,
      msg: index.toString(),
    },
    "300000000000000",
    "1"
  );
  return response;
}
//ファイル終端
変更点は以下の2点です。
- コントラクト側で用意した
amount_to_use_bikeを使用できるように関数用意。 - バイクの使用のインタフェースを
bikeコントラクトのuse_bikeメソッドから,ftコントラクトのft_transfer_callに変更しました。
続いてfrontend/App.jsで追加した関数を利用するよう変更します。
// App.js
// ...
import {
amount_to_use_bike,
ft_balance_of,
ft_transfer,
ft_transfer_call,
inspect_bike,
is_available,
login,
logout,
num_of_bikes,
return_bike,
storage_balance_of,
storage_deposit,
storage_unregister,
who_is_inspecting,
who_is_using,
} from "./assets/js/near/utils";
export default function App() {
// ...
useEffect(() => {
/** バイクを使用するために必要なftの量を取得しセットします。 */
const initAmountToUseBike = async () => {
const amount = await amount_to_use_bike(); // <- amount_to_use_bike()使用
setAmountToUseBike(BigInt(amount));
};
// ...
}, []);
// ...
/* 削除してください
const useBikeThenUpdateInfo = async (index) => {
console.log("Use bike");
setRenderingState(RenderingStates.TRANSACTION);
try {
await use_bike(index);
} catch (e) {
alert(e);
}
await updateBikeInfo(index);
setRenderingState(RenderingStates.HOME);
};
*/
// useBikeThenUpdateInfoを削除した代わりに以下の関数を追加!
/** バイクを使用、バイク情報を更新します。 */
const transferFtToUseBike = async (index) => {
console.log("Transfer ft to use bike");
// 不要な�トランザクションを避けるためにユーザの残高を確認
const balance = await ft_balance_of(window.accountId);
if (balance < amountToUseBike) {
alert(amountToUseBike + "ft is required to use the bike");
} else {
try {
ft_transfer_call(index, amountToUseBike.toString());
// bikeコントラクト側で指定バイクの使用処理が実行されます.
// トランザクションへのサイン後は画面がリロードされます.
} catch (e) {
alert(e);
}
}
};
// ...
// useのonClickでtransferFtToUseBikeを使用するように変更
const bikeContents = () => {
return (
<div>
{allBikeInfo.map((bike, index) => {
return (
<div className="bike" style={{ display: "flex" }} key={index}>
<div className="bike_img">
<img src={bikeImg} />
</div>
<div className="bike_index">: {index}</div>
<button
// ボタンを無効化する条件を定義
disabled={!bike.available}
onClick={() => transferFtToUseBike(index)} // <- 変更!
>
use
</button>
<button
// ボタンを無効化する条件を定義
disabled={!bike.available}
onClick={() => inspectBikeThenUpdateInfo(index)}
>
inspect
</button>
<button
// ボタンを無効化する条件を定義。
// ログインユーザがバイクを使用も点検もしていない場合は使用できないようにしています。
disabled={!bike.in_use && !bike.inspection}
onClick={() => returnBikeThenUpdateInfo(index)}
>
return
</button>
</div>
);
})}
</div>
);
};
// ...
}
それではnear_bike_share_dapp直下で以下のコマンドを実行してみましょう!
$ yarn dev
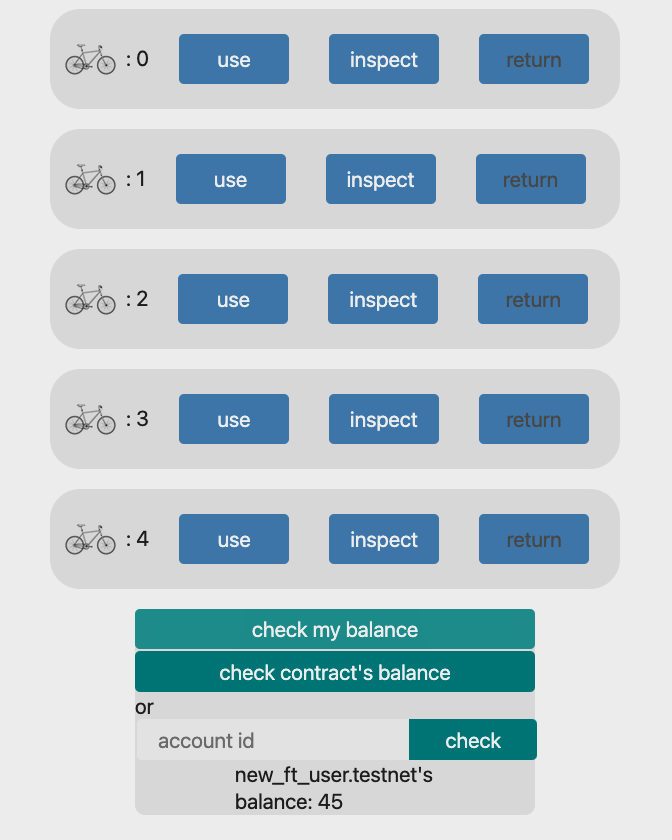
ブラウザでアプリが立ち上がれば挙動を確認しましょう!
バイクを使用する前のユーザ(自分)��の残高を確認します。
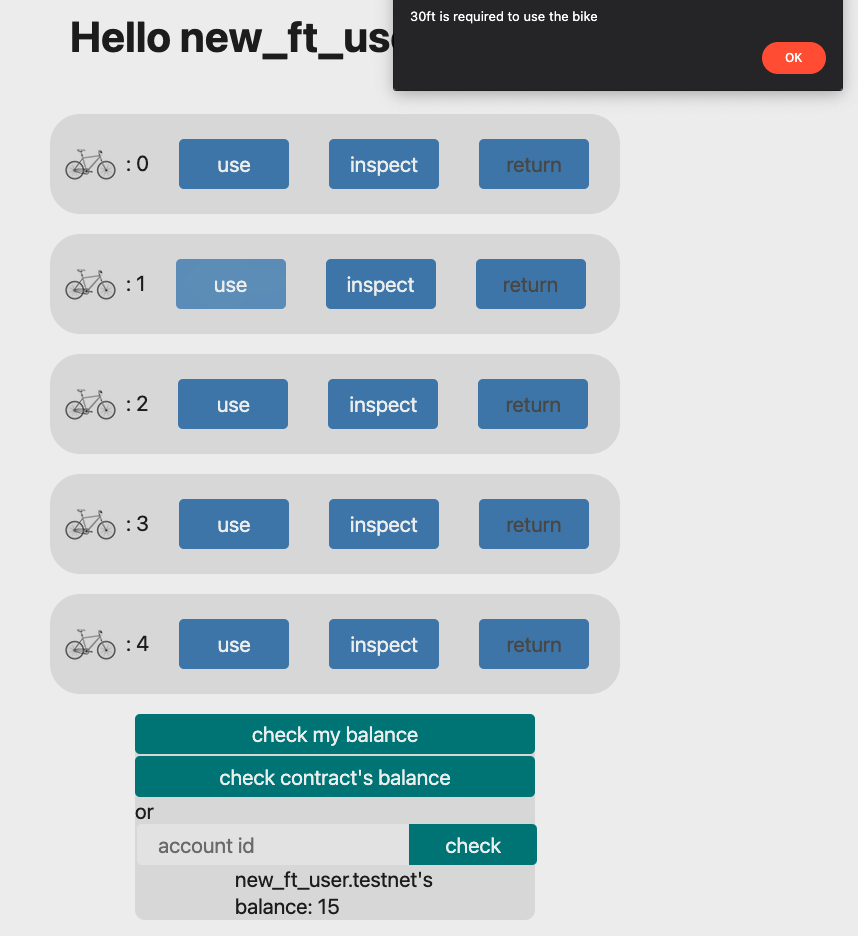
バイク使用後のユーザ(自分)の残高を確認します(30ft引かれています!)

残高が足りない状態でバイクの使用を試みます(アラートが出ます!)
ブラウザ上でConsoleを開き、ログの最後に表示されたURL(コントラクトアカウントIDに関するURL)をブラウザに貼り付けてトランザクション履歴などを確認しましょう!
🙋♂️ 質問する
ここまでの作業で何かわからないことがある場合は、Discordの#nearで質問をしてください。
ヘルプをするときのフローが円滑になるので、エラーレポートには下記の3点を記載してください ✨
1. 質問が関連しているセクション番号とレッスン番号
2. 何をしようとしていたか
3. エラー文をコピー&ペースト
4. エラー画面のスクリーンショット
おめでとうございます!
先ほどブラウザに貼り付けたURL(コントラクトアカウントIDに関するURL)を#nearに投稿して、あなたの成功をコミュニティで祝いましょう 🎉