lesson-5_デバイスデータの登録機能を完成させよう
📊 デバイスデータを登録しよう
デバイスエイリアスとキーペアの生成ができたので、これらをバックエンドキャニスターに登録しましょう。
lib/cryptoService.ts内のinit関数を更新します。/** STEP8: デバイスデータを登録します。 */の部分に下記のコードを追加しましょう。
/** STEP8: デバイスデータを登録します。 */
// publicKeyをexportしてBase64に変換します。
const exportedPublicKey = await window.crypto.subtle.exportKey(
  "spki",
  this.publicKey
);
this.exportedPublicKeyBase64 = this.arrayBufferToBase64(exportedPublicKey);

// バックエンドキャニスターにデバイスエイリアスと公開鍵を登録します。
await this.actor.registerDevice(this.deviceAlias, this.exportedPublicKeyBase64);
追加したコードを確認します。
キーペアを生成する際、'extractable'にtrueを��指定していたことを覚えていますか(前回のレッスンを参照)? ここでは、exportKey関数を使用して実際に鍵をエクスポートしています。第一引数にフォーマットを指定します。エクスポートしたい鍵の種類によって指定できるフォーマットが異なります。今回は公開鍵をエクスポートするため、spki(SubjectPublicKeyInfo)を指定します。
const exportedPublicKey = await window.crypto.subtle.exportKey(
  "spki",
  this.publicKey
);
エクスポートされた公開鍵はバイナリデータですが、そのままでは扱いづらいためbase64に変換します。arrayBufferToBase64関数は、既に定義されているprivate関数です。
this.exportedPublicKeyBase64 = this.arrayBufferToBase64(exportedPublicKey);
base64 とは
データを他の形式へ変換する方法(エンコード方式)の1つです。全ての�データを「a~z, A~Z」「0~1」「+, /」と末尾の「=」で表現します。バイナリデータは特殊文字を含む可能性があります。これをそのまま扱うと、データをやり取りする間にシステムによっては正しく解釈できない可能性があり、データ破損の原因となり得ます。バックエンドキャニスターに保存し、再度取り出した時に元の公開鍵と違う値になっていたら困りますよね。そこで、多くのシステムやプログラミング言語がサポートしているbase64エンコーディングを使用することで、データを安全に扱うことができます。
公開鍵の型変換が完了したら、デバイスエイリアスと一緒にバックエンドキャニスターに登録します。
await this.actor.registerDevice(this.deviceAlias, this.exportedPublicKeyBase64);
デバイスデータの登録機能が実装できたので、登録したデバイスデータを取得して表示しましょう。
routes/devices/内のindex.tsxを更新します。このファイルは、デバイス一覧を表示するページのコンポーネントです。getDevices関数内の空配列を設定しているsetDeviceAliases([]);を、下記のように更新しましょう。
const getDevices = async () => {
  if (auth.status !== "SYNCED") {
    console.error(`CryptoService is not synced.`);
    return;
  }

  try {
    // バックエンドキャニスターからデバイスエイリアス一覧を取得します。
    const deviceAliases = await auth.actor.getDeviceAliases();
    setDeviceAliases(deviceAliases);
  } catch (err) {
    showMessage({
      title: "Failed to get devices",
      status: "error",
    });
  }
};
バックエンドキャニスターのgetDeviceAliases関数を呼び出し、取得したデータをsetDeviceAliases関数でステートに保存します。
✅ 動作確認をしよう
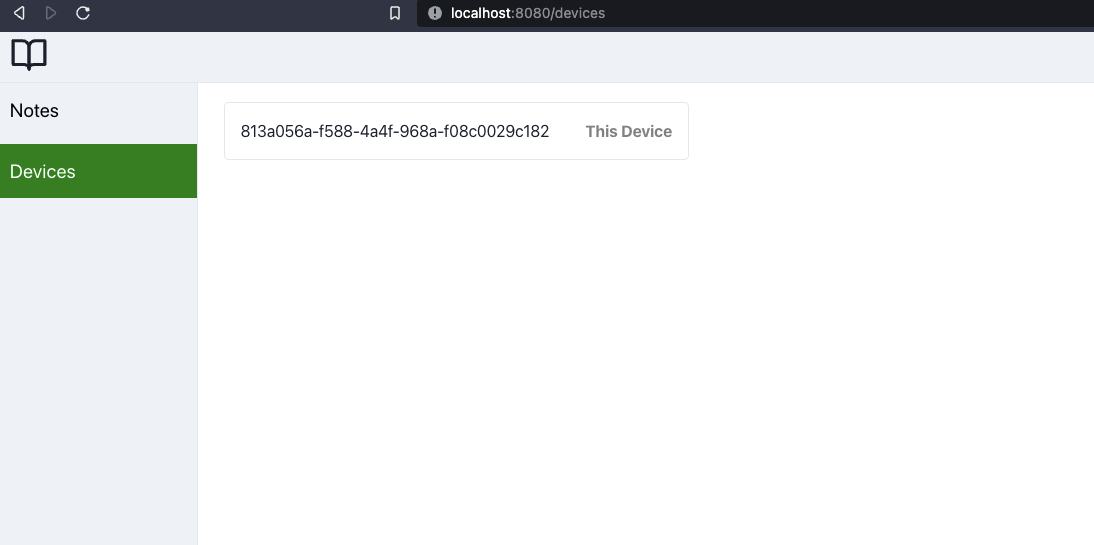
まずは、現在の状態を確認します。サイドバーの「Devices」をクリックします。
デバイス一覧ページに、デバイスエイリアスが1つ表示されていることを確認します。

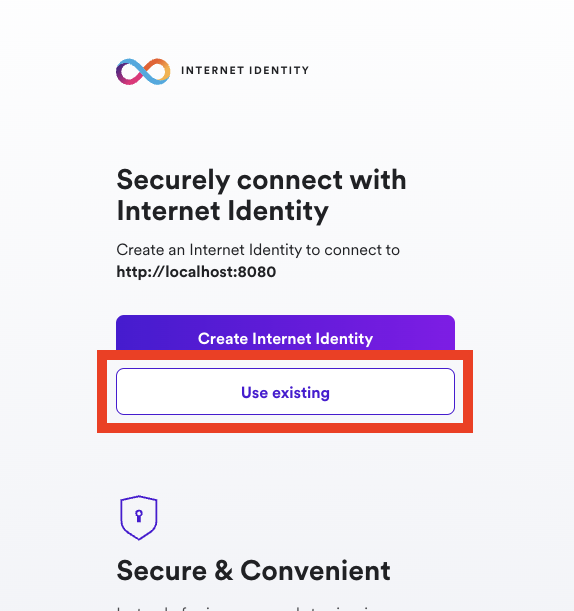
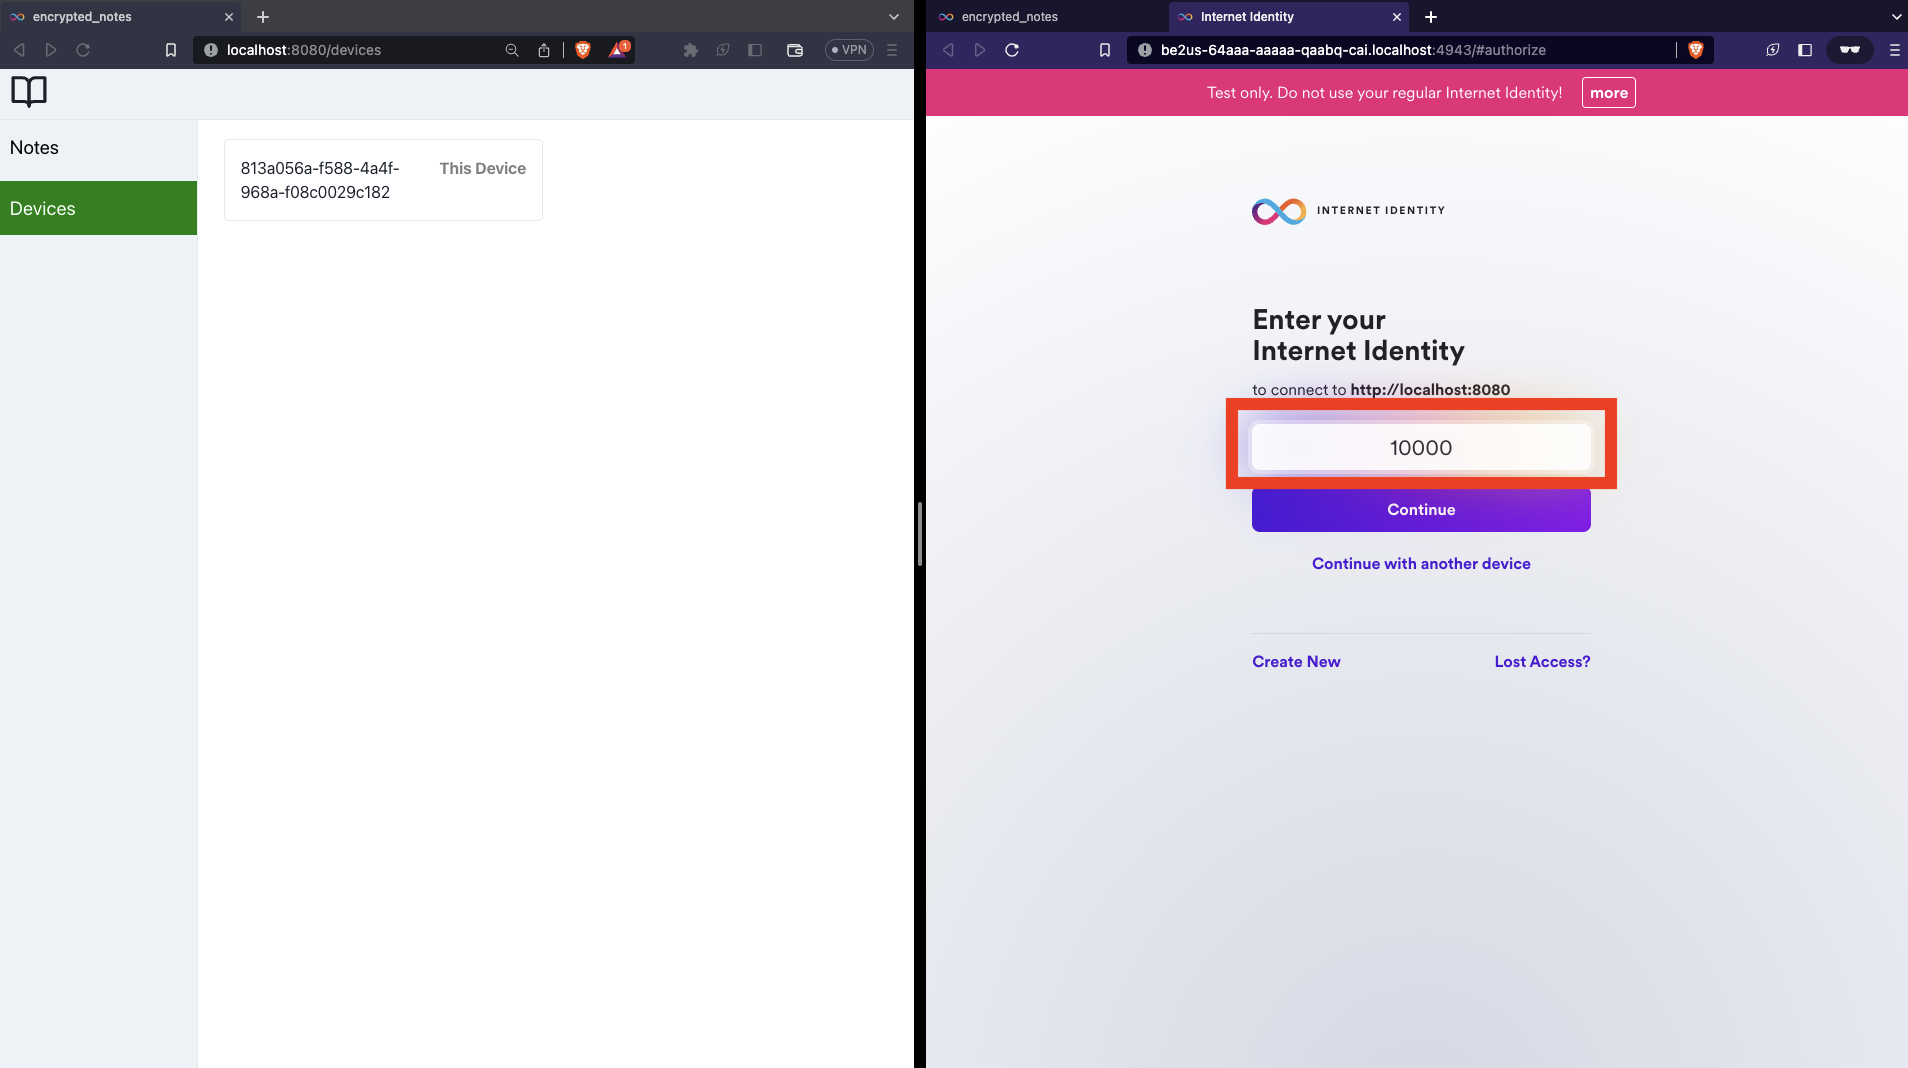
次に、別のデバイスを追加してみましょう。シークレットブラウザを開き、http://localhost:8080 にアクセスします。ログインボタンを押して認証ページが開いたら、「Use existing」を選択します。

現在アプリケーションにログインしているInternet Identityと同じ値で認証します。ここでは10000で認証しています(画像右)。

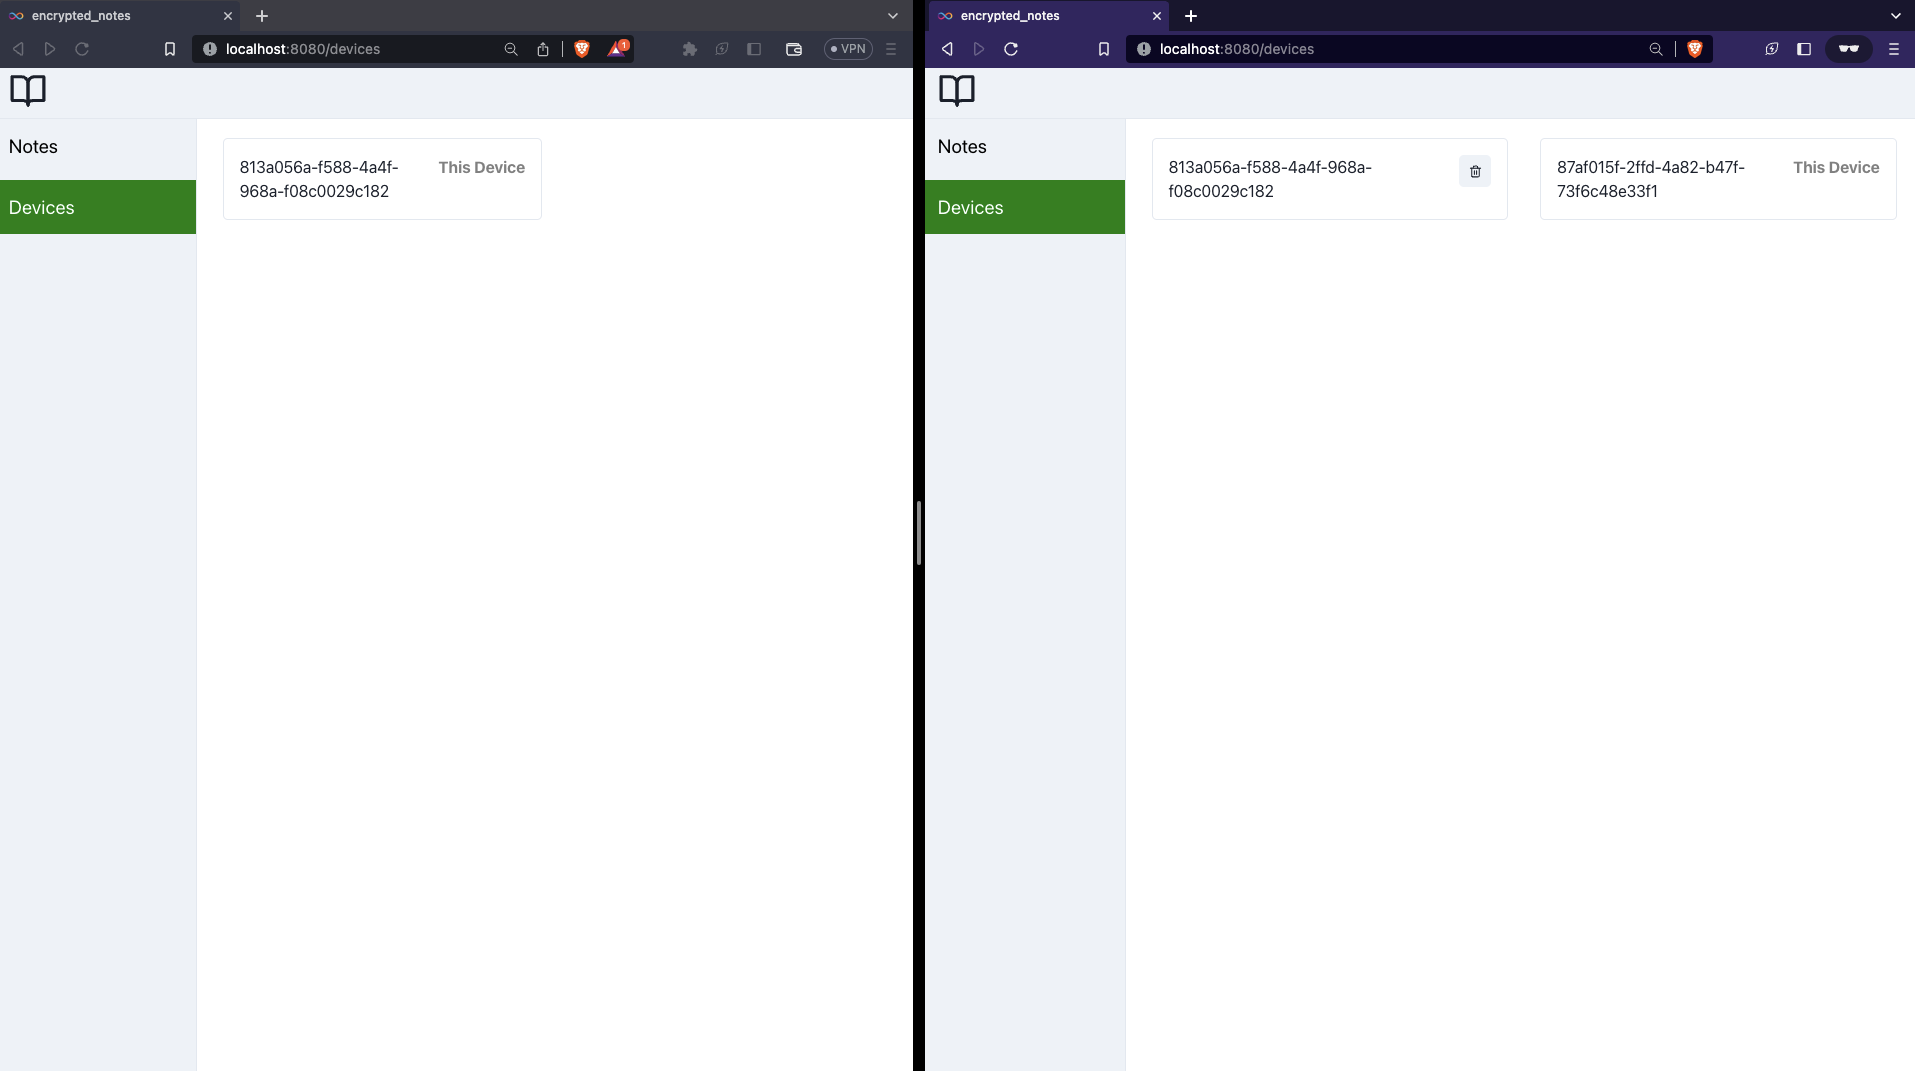
認証後、デバイス一覧ページを開くとデバイスエイリアスが2つ表示されているはずです。

最初に使用していたブラウザ(画像では左)の画面をリロードすると、こちらでもデバイスエイリアスが2つ表示されていることが確認できるはずです。
これで、デバイスデータの登録機能が完成しました!
📝 このレッスンで追加したコード
lib/cryptoService.ts
  public async init(): Promise<boolean> {
    /** STEP6: 公開鍵・秘密鍵を生成します。 */
    // データベースから公開鍵・秘密鍵を取得します。
    this.publicKey = await loadKey('publicKey');
    this.privateKey = await loadKey('privateKey');

    if (!this.publicKey || !this.privateKey) {
      // 公開鍵・秘密鍵が存在しない場合は、生成します。
      const keyPair: CryptoKeyPair = await this.generateKeyPair();

      // 生成した鍵をデータベースに保存します。
      await storeKey('publicKey', keyPair.publicKey);
      await storeKey('privateKey', keyPair.privateKey);

      this.publicKey = keyPair.publicKey;
      this.privateKey = keyPair.privateKey;
    }

    /** STEP8: デバイスデータを登録します。 */
+    // publicKeyをexportしてBase64に変換します。
+    const exportedPublicKey = await window.crypto.subtle.exportKey(
+      'spki',
+      this.publicKey,
+    );
+    this.exportedPublicKeyBase64 = this.arrayBufferToBase64(exportedPublicKey);
+
+    // バックエンドキャニスターにデバイスエイリアスと公開鍵を登録します。
+    await this.actor.registerDevice(
+      this.deviceAlias,
+      this.exportedPublicKeyBase64,
+    );

    /** STEP9: 対称鍵を生成します。 */

    return true;
  }
routes/devices/index.tsx
  const getDevices = async () => {
    if (auth.status !== 'SYNCED') {
      console.error(`CryptoService is not synced.`);
      return;
    }

    try {
      // バックエンドキャニスターからデバイスエイリアス一覧を取得します。
-      setDeviceAliases([]);
+      const deviceAliases = await auth.actor.getDeviceAliases();
+      setDeviceAliases(deviceAliases);
    } catch (err) {
      showMessage({
        title: 'Failed to get devices',
        status: 'error',
      });
    }
  };
🙋♂️ 質問する
ここまでの作業で何かわからないことがある場合は、Discordの#icpで質問をしてください。
ヘルプをするときのフローが円滑になるので、エラーレポートには下記の4点を記載してください ✨
1. 質問が関連しているセクション番号とレッスン番号
2. 何をしようとしていたか
3. エラー文をコピー&ペースト
4. エラー画面のスクリーンショット
次のセクションに進み、ノートの共有機能を完成させましょう 🎉