lesson-1_Deploy Contracts
🌎 Deploy the whitelist and NFT contracts on the testnet.
Before deploying contracts on the testnet, you can thoroughly test the contracts using
JS VM, as it doesn't require gas and deployment is quick.
Do you recall that we received test tokens on the Polygon Amoy testnet initially? Next, our task is to deploy the Whitelist.sol and Shield.sol contracts on this testnet.
Click on the "Connected" button in the upper-right corner and then select "Disconnect".

Select Injected Web3 Provider

Click Metamask

Select Amoy

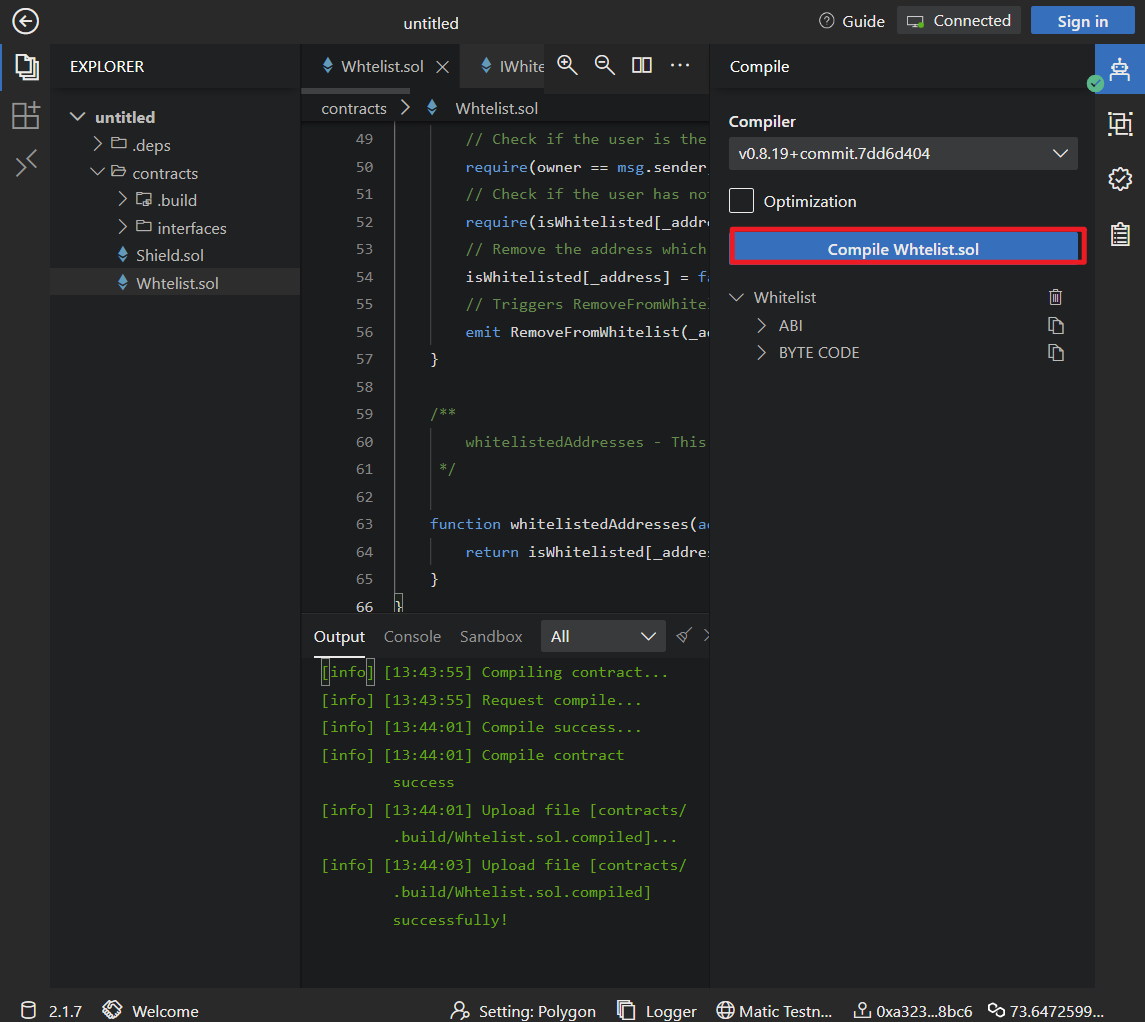
📝 Depoly Whitelist.sol
Compile Whitelis.sol first
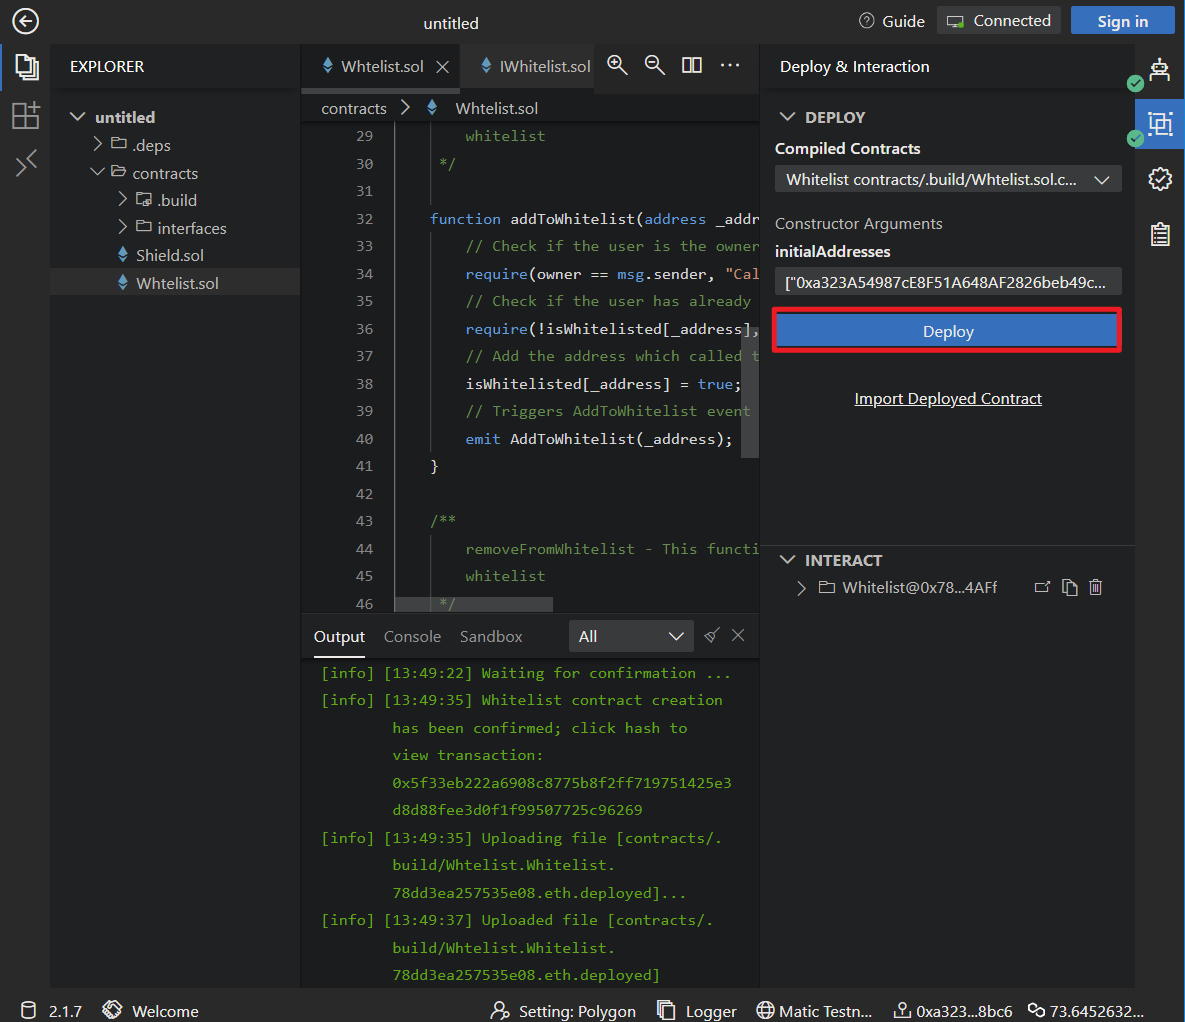
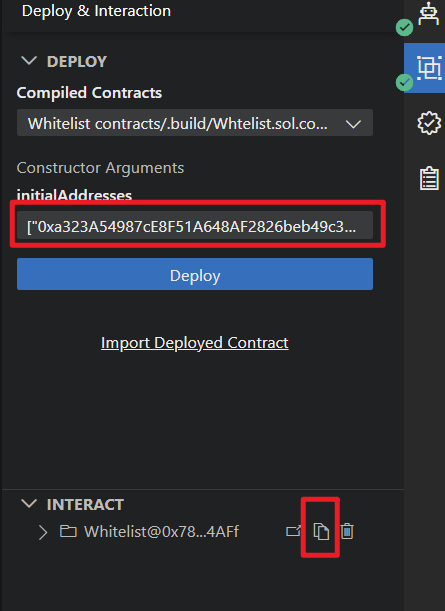
Navigate to the Deploy panel and enter an array of up to 4 distinct whitelist addresses, such as:["0xa323A54987cE8F51A648AF2826beb49c368B8bC6","0x4f2249958655e1b78064cc3d1F1b8a0B12D1dbDE","0x03692A0187c6D8Be757Be0f0775b94B484fFC15D","0x643AAe9DA7f3542f370FD87ea1781bD54D541578"]
Click Deploy
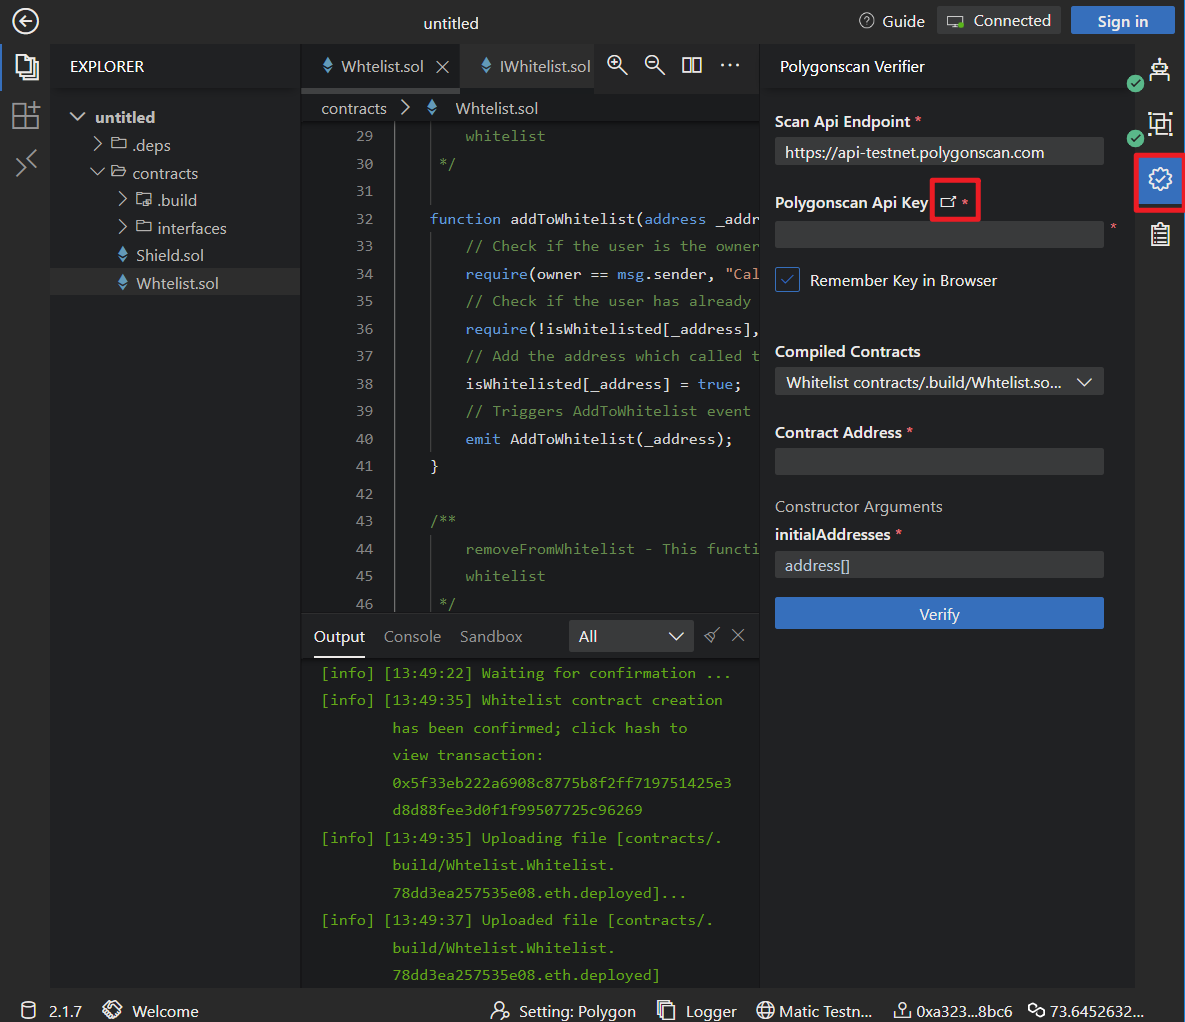
The next step, which differs from using JS VM, involves verifying the contract. After verifying the contract, it will be open-sourced on platforms like Etherscan, allowing others to review the source code and ensuring the contract's fairness and accuracy.
ChainIDE offers a convenient Verify plugin. Users simply need to acquire the corresponding Scan API Key to quickly verify the contract.
Switch to the Verify page and click on the redirect link next to "Polygon API Key".
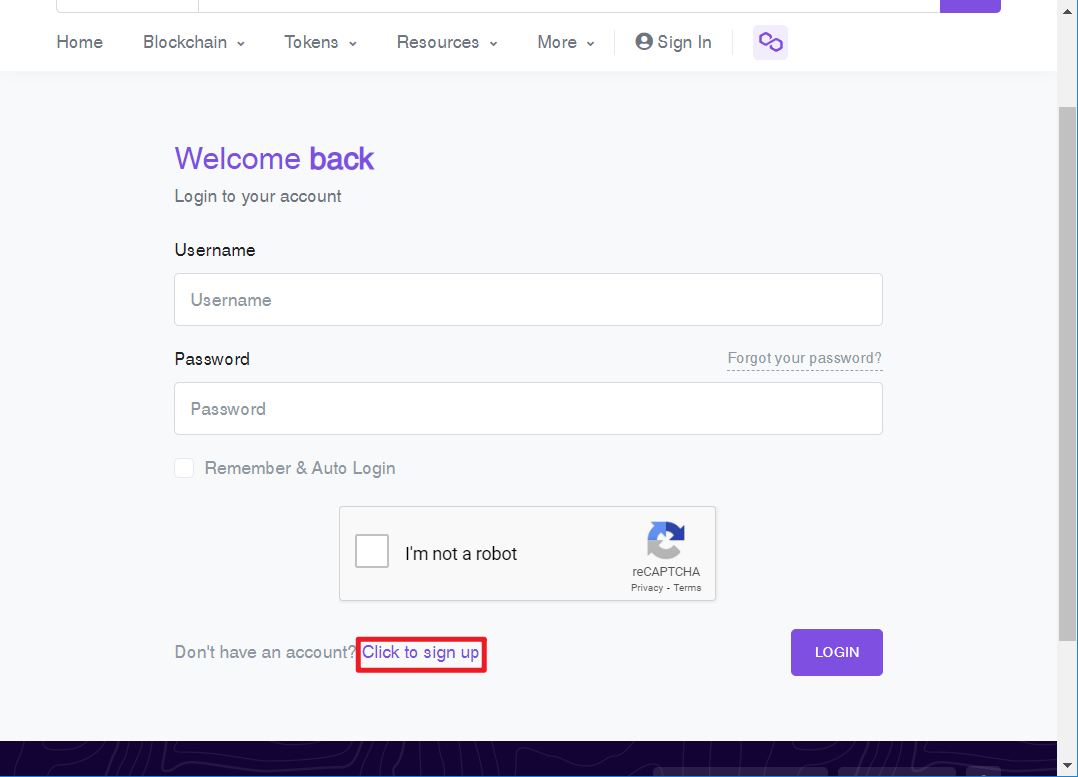
On the login page, choose either "Login" or "Click to sign up".
Select API Keys
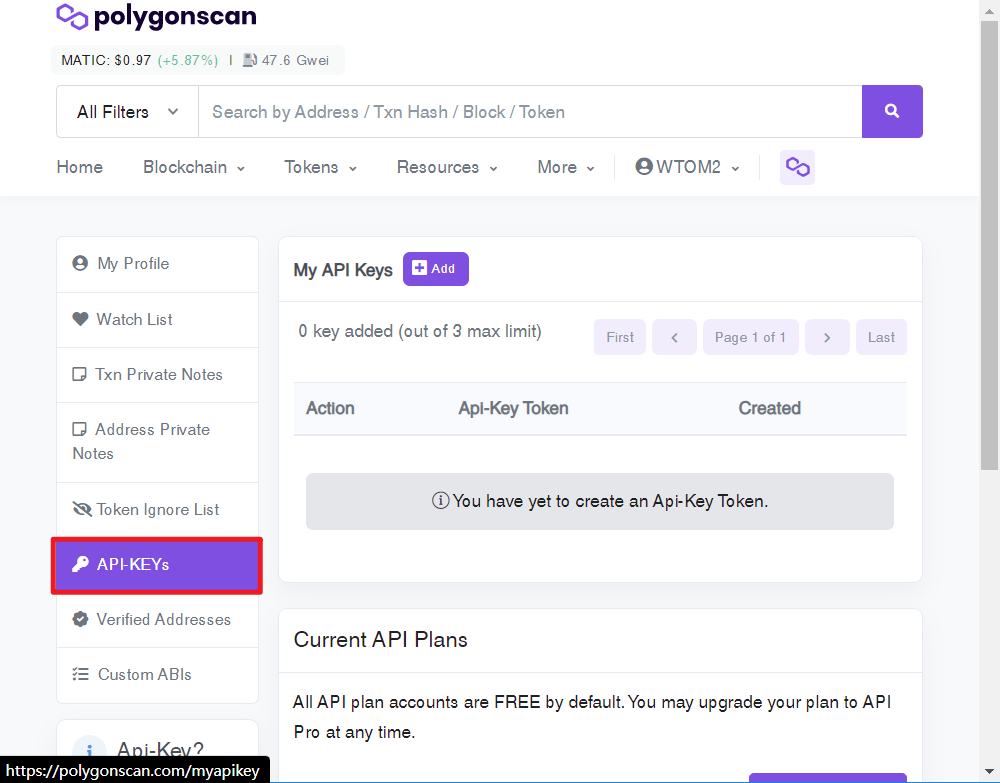
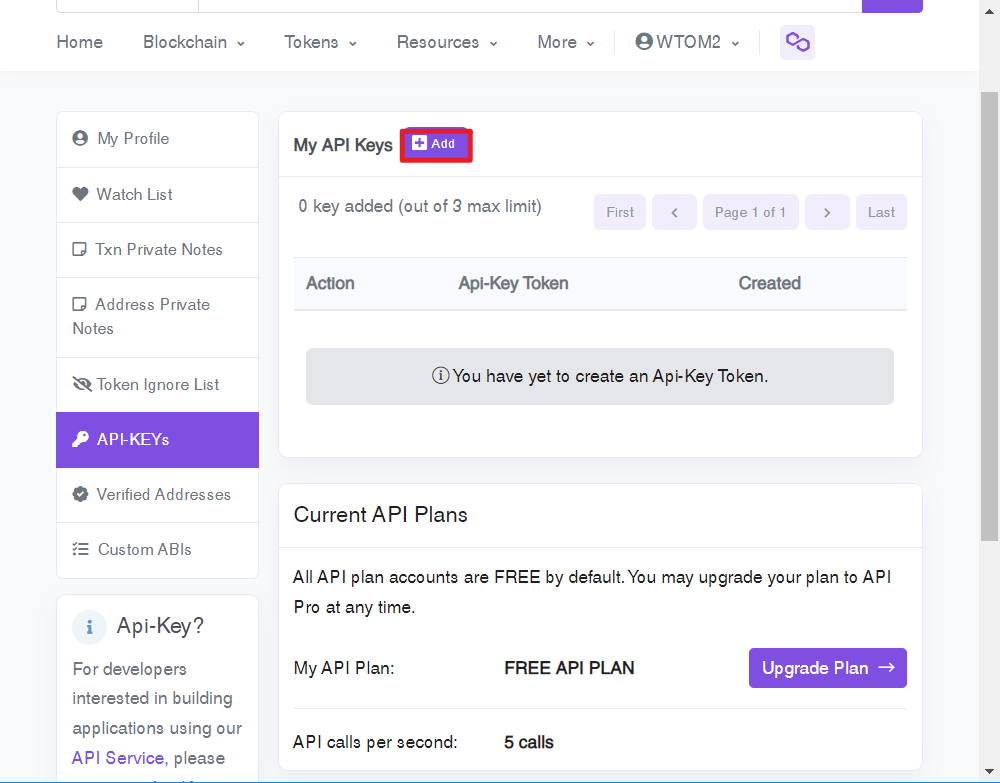
Select add
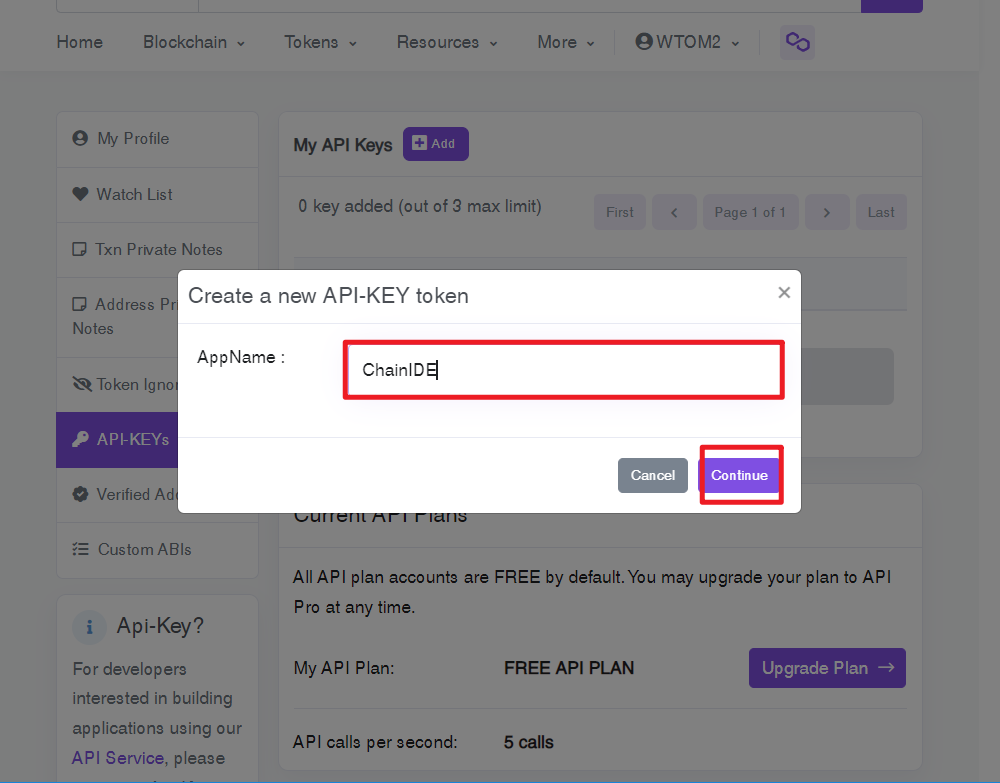
App Name, enter a name you like, and then click Continue
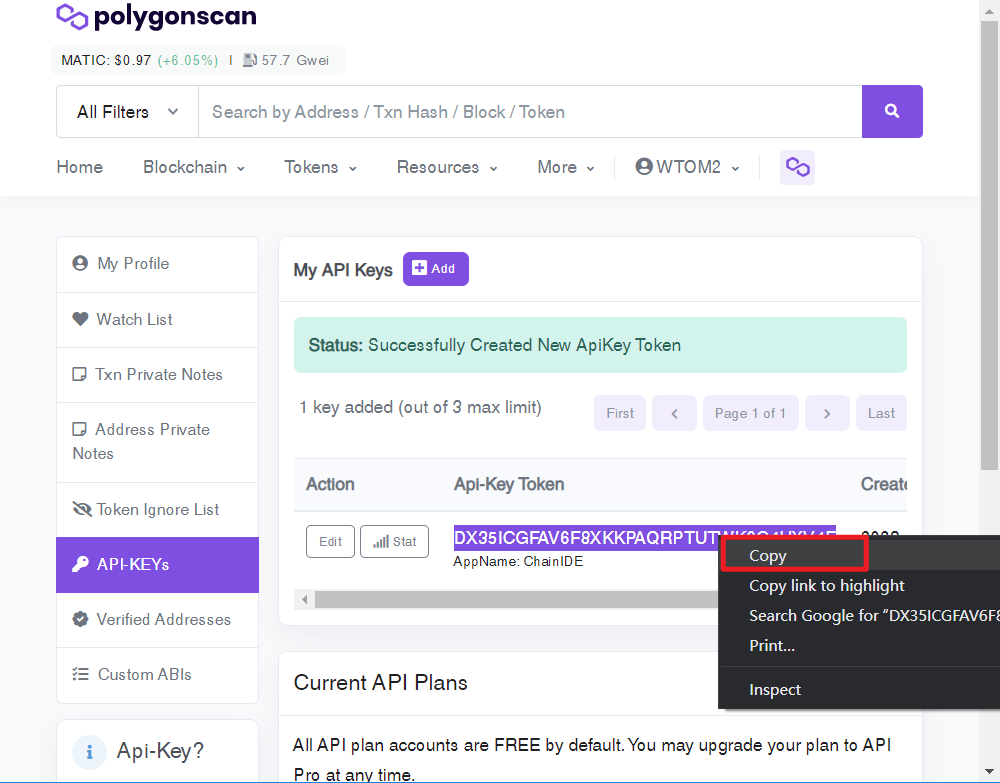
Then, your API Key will be generated. (Please be cautious and avoid sharing the key with others. The usage speed of the key is limited. One of my keys is 98TSWD2C57949VSZVFCZ15WKYDVSCMJKQM). Click "Copy".
Paste into ChainIDE
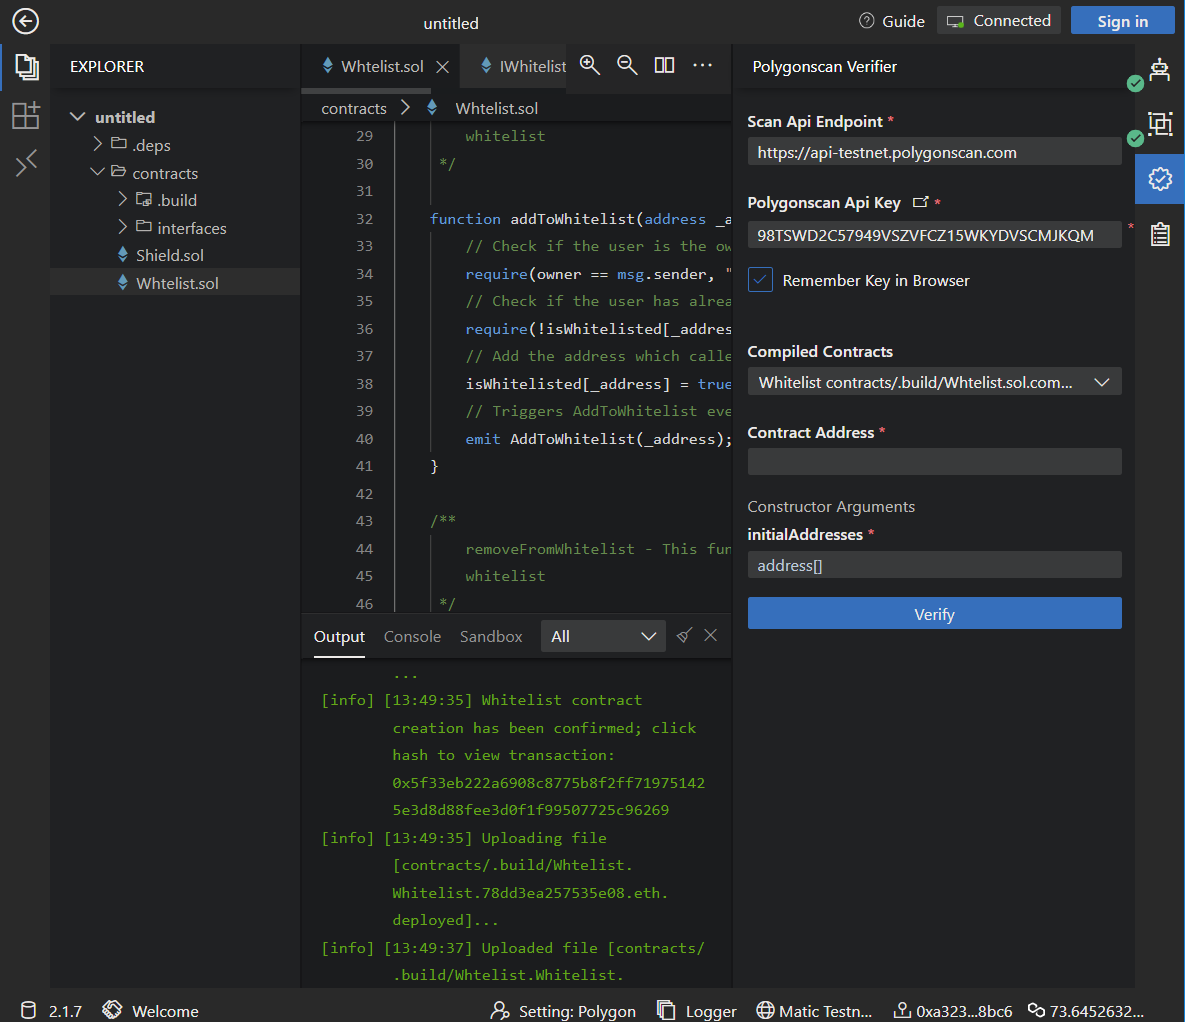
Also, in the Deploy panel, copy the corresponding constructor and contract address.
Paste them into the Verify panel, then click "Verify".

Congratulations, verification successful!

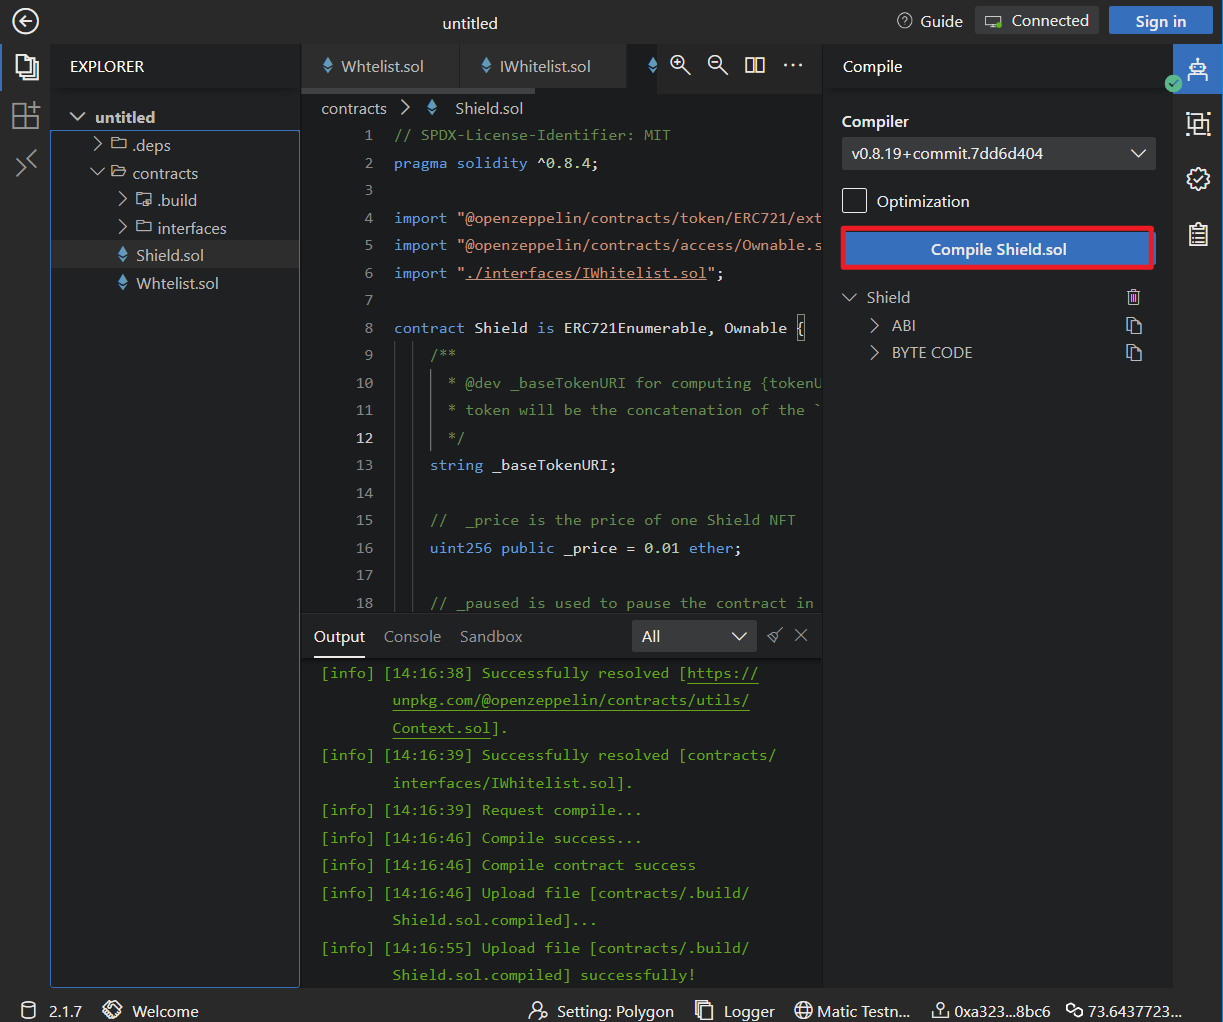
🛡 Deploy Shield.sol
Let's start by compiling the Shield.sol.
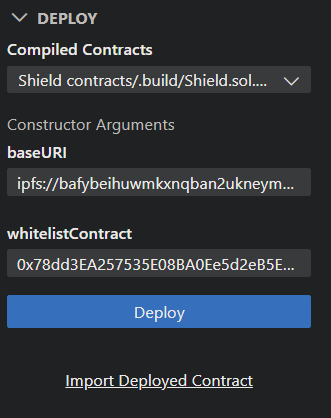
Switch to the deploy page. In the constructor:
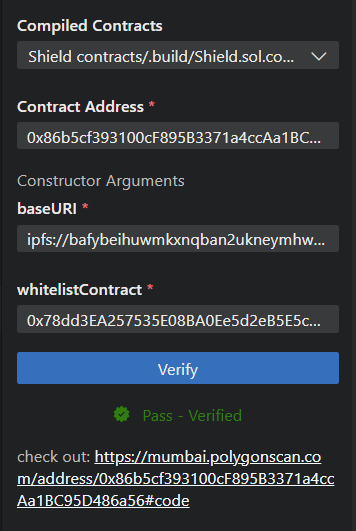
baseURIshould be the IPFS URI generated in the Metadata section. Mine is:ipfs://bafybeihuwmkxnqban2ukneymhwctxfqec5ywrdiqyc7vmyegftrrllf7gq/whitelistContractis the address of the whitelist we just deployed. Mine is:0x78dd3EA257535E08BA0Ee5d2eB5E5c8C64304AFf
After deployment, navigate to the Verify page again. Input the same baseURI and whitelistContract for verification. Also, input the address of the just-deployed Shield.sol contract. Click "Verify" and wait for successful verification.
Cool, the contract-related part is almost concluded. Next, we need to develop a frontend page for users on the whitelist to perform minting operations.
🙋♂️ Asking Questions
If you have any uncertainties or issues with the work done so far, please ask in the #polygon channel on Discord.
To streamline the assistance process, kindly include the following 4 points in your error report ✨:
1. Section and lesson number related to the question
2. What you were trying to do
3. Copy & paste the error message
4. Screenshot of the error screen